


Building my first AR15
Yeah, it was bound to happen. . . had to build an Armalite based rifle. No sorry the AR in AR15 does not mean "Assault Rifle" it is the name of the original designing company, they have actually made quite a few different AR variants but the 15 is the one that won a competition for the US military designated the M16 and the design of the ar15 as well as it's older brother the ar10 was sold to Colt.
Now with the little informational lesson over (Like you didn't already know, right?) lets break down the basic tools I will be using.
-
Screwdrivers
-
Hammer
-
Punches
-
Lower Vise Block
-
Upper Receiver Extension Torque Tool
-
AR15 Armorer's Multi Tool
-
Vise
-
Torque Wrench
-
Breaker Bar
Some of the above are not needed to complete, you can technically forgo the Roll Pin Punches and the Poll Pin Holders, probably even the vise and lower vise block if you don't plan to do a whole lot of builds and get the Upper Receiver Extension Tool. But the vise works really well as an extra hand when coupled with the Lower vise block. The Vise I have is a cheapo that clamps to a table or work bench, I don't plan to do a lot of heavy work with it but because it rotates and swivels I can position my work in most any angle. Some people suggest tools for inserting the springs and detents for the takedown pins, I have now assembled two AR15 lowers and have had zero issues with pins or springs flying. I just make sure to capture the spring and detent pin with the takedown pin while I am inserting it into the available hole, but if you don't have keen eyes and steady hands you may want to get a tool to help if not a couple spares for just in case.
While tightening the barrel nut I actuallty ended up using the Brownell's Barrel Extension tool along with a Tapco Armorer's tool a torque wrench and a breaker bar and then tightening on the floor which is an added advantage of using the combination of tools and was a result of the vise I had not being sturdy enough to hold up to a 250 pound man cranking on it.
Anyway it won't be too long before I have a few reviews of the tools I used as well as the parts posted but for now enjoy the gun porn.
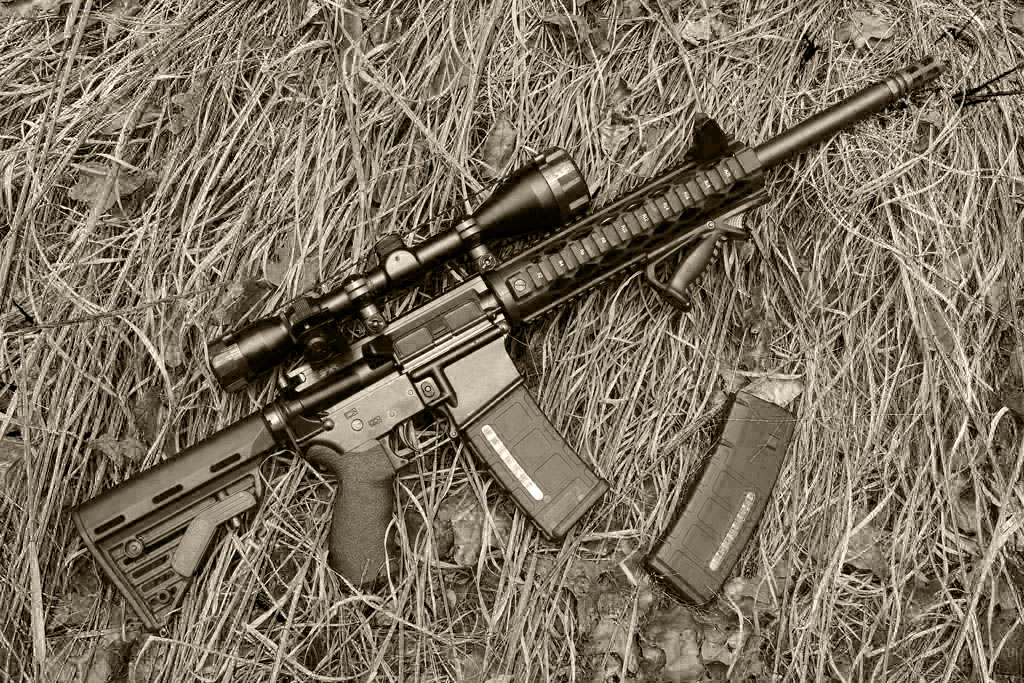
And now for a parts list since you are probably wondering.
- Surplus Arms forged upper and lower
- Blackhole Weaponry 5.56 16" Bull Barrel (Polygonally Rifled)
- PSA Lower Parts Kit with Blackhawk Furniture
- Surplus Arms NIB Bolt Carrier with Black Phosphate Bolt and Gas Key
- YHM Compensator
- YHM Diamond Freefloat Forearm Specter Length
- DPMS Steel .936 Gas Block
- Surplus Arms Upper Parts kit and Gas tube
- PTK Angled Foregrip
- 45 Degree Rapid Transition Backup sites and for now a cheapo 3-9X50 scope
- Magpul 30round PMAG with window
- BCM Large Latch charging handle
I shopped around for deals when I could find them and actually got the stripped upper receiver for free when I bought the barrel so in all honsety I saved at least 60 right there and the barrel I used is now 30.00 higher. The LPK was a sale with free shipping and included the blackhawk grip, stock, buffer tube, buffer and buffer spring at about 85. In all I have about 900 invested with shipping and the transfer which was $10.00 and I have already had offers of around $1200 for the rifle as it sits. It balances almost perfectly at the point where the barrel meets the upper receiver and while slightly heavy isn't too bad to handle and with the compensator and bull barrel has almost no recoil and almost no muzzle rise. . . if this had a full auto trigger you could stay on target all day easily.
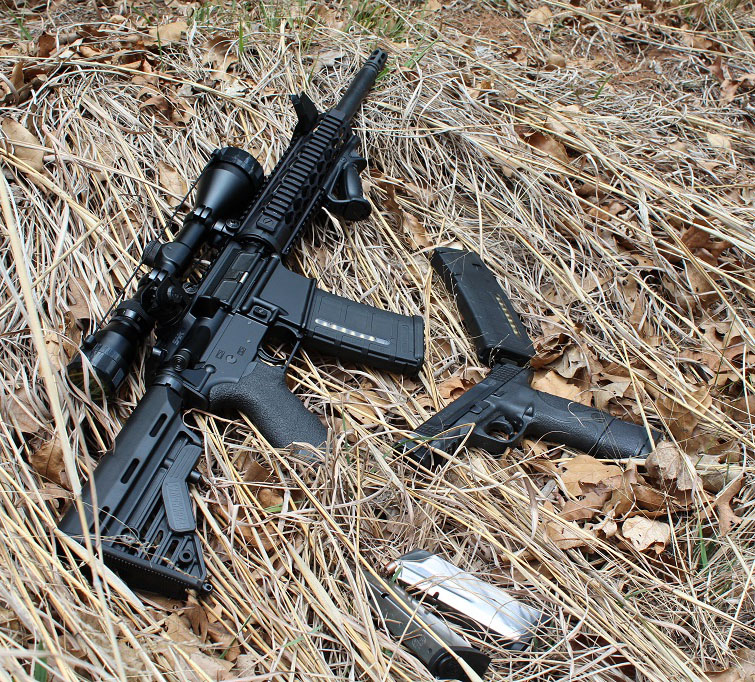
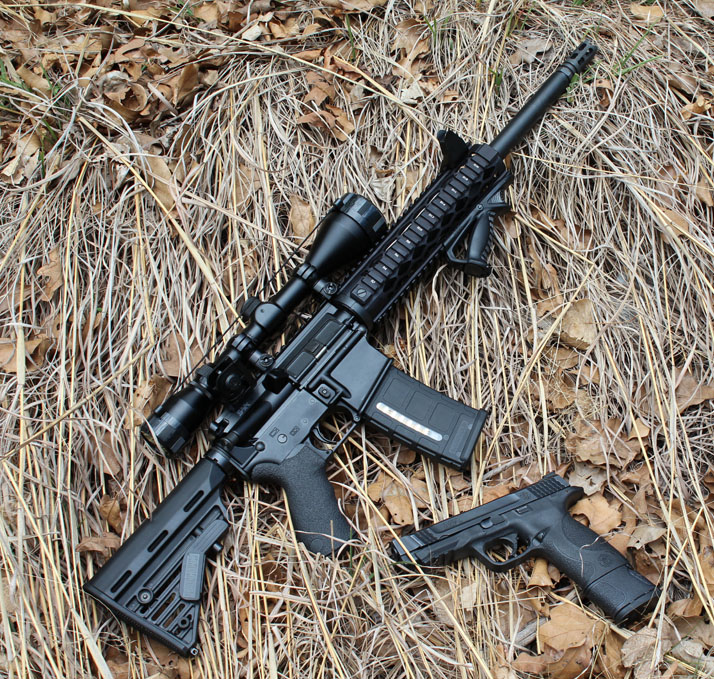
So thats it, my build out. . . will be doing some reviews on parts and tools soon so stay tuned. And for those wondering the pistol in the picture is a S&W M&P 45 full size with the Factory 14 round mag.
Stay safe out there, America. The crazies are always out on the prowl.


